Tag: multiple exposures

  • Double Exposures on Film

    Double Exposures on Film

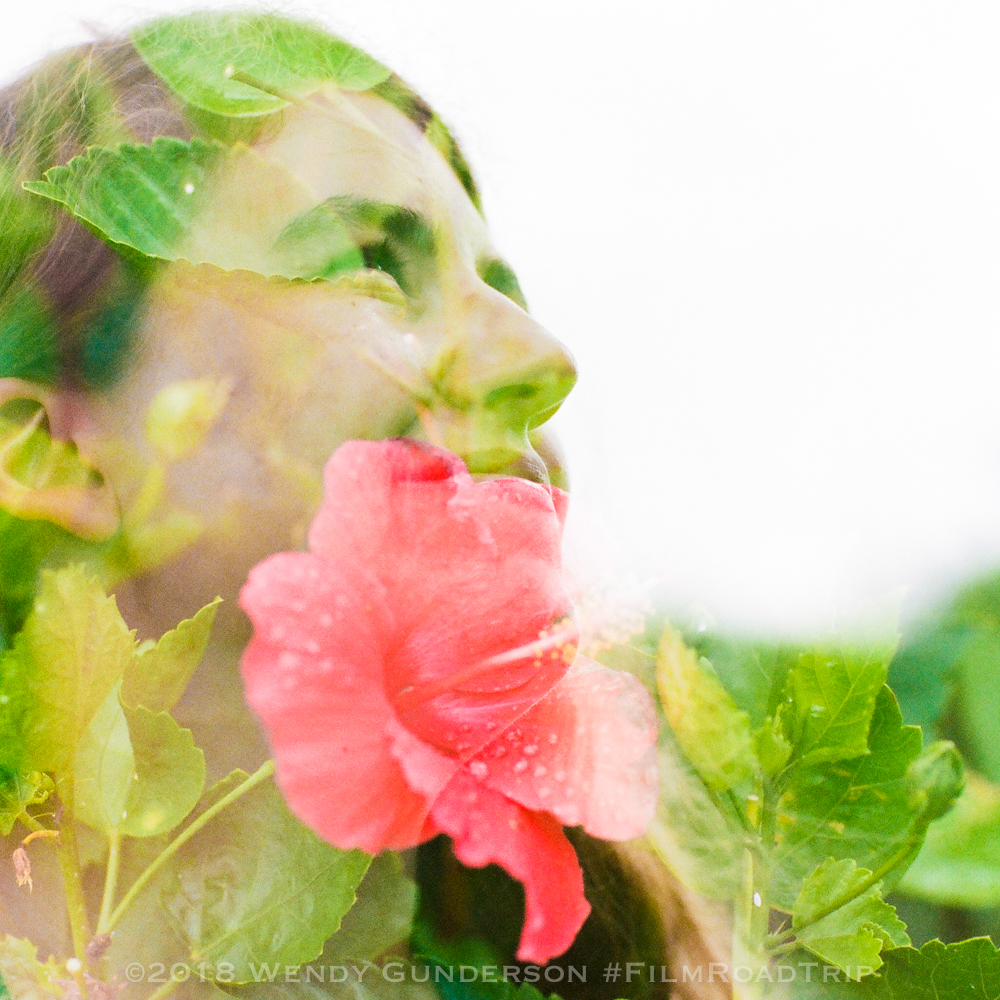
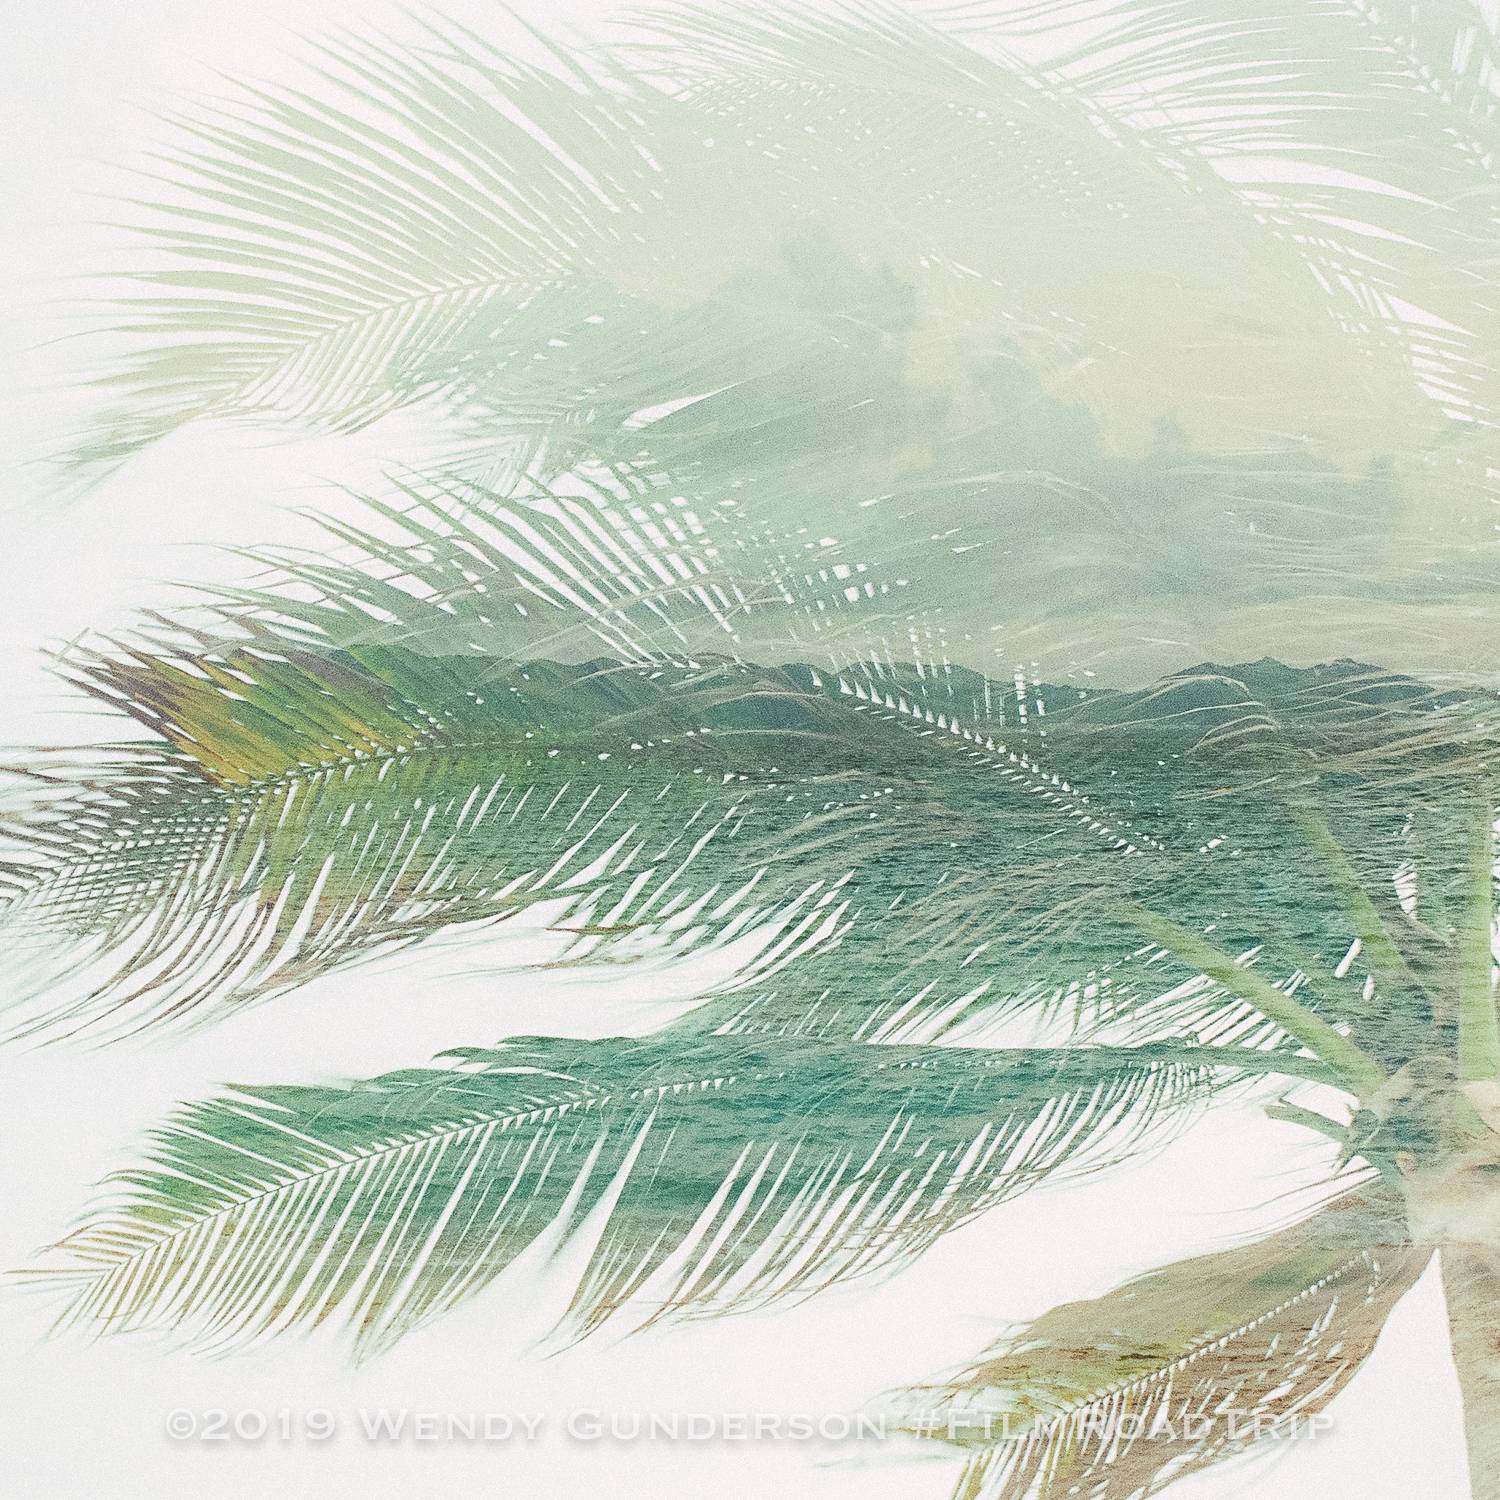
    I love shooting film, in part, because of the thrill of seeing what you captured. Unlike digital, where you have immediate feedback, you never quite know what you’ve got until you either develop your film or receive it back from your lab. With double exposures, the excitement is that much better. It’s not just a matter of what you have captured, but how you lined up the two exposures to reveal an entirely new composition. Here’s a super quick step-by-step guide on how I shoot double exposures on film.

    This image has an empty alt attribute; its file name is Anguilla-2019-Film-Road-Trip-Double-Exposures-Film-107.jpg
    Exposure #1: Mamiya 6 on my picnic table in full sun. You can see the shadow to the foreground and to the right. Exposure #2: Trees in my backyard. Shot on the Canon AE-1 Program and Fuji Velvia 100 RVP.

    When you think about a double exposure on film, you have to know the basics of how exposure works. When you take the first shot, the areas which are white or very light are fully exposed. You will not be able to see anything in this area in the second exposure because essentially the film is spent in those areas. The are fully exposed and the film has nothing more to give. What is darker in your first exposure still has potential. When you make that second exposure, what was dark in the first exposure will be where the second exposure will materialize.

    This image has an empty alt attribute; its file name is Anguilla-2019-Film-Road-Trip-Double-Exposures-Film-103.jpg
    Exposure #1: My daughter, shot from below looking up to set her profile against the sky. Exposure #2: Beautiful hibiscus found on the island of Nevis. Shot on Canon EOS 1v with Kodak Portra 400.

    Exposure #1

    For my first exposure, I look for high contrast subjects. You can shoot a skyline against a bright sky, a person’s profile against a white or light-colored background, or a dark shadow surrounded by bright sunlight. What is white or light in color will be washed out. What is darker in the image is your canvas for your second exposure. It’s not necessary to have an object in silhouette or high contrast, but I like this look. Double exposures can also be effective without a silhouette, but the final product will have more of each exposure retained. When you make the first exposure you have to keep in mind what is fully exposed and what is left for your second exposure.

    This image has an empty alt attribute; its file name is Anguilla-2019-Film-Road-Trip-Double-Exposures-Film-115.jpg
    Exposure #1: Villas and palm trees at Belmond Cap Juluca, Anguilla. Exposure #2: Maunday’s Bay , Anguilla. Both shot at sunset. Shot on Canon EOS 1v with Kodak Portra 800.

    Exposure #2

    For your second exposure, you are looking to fill those dark spaces from your first exposure. Anything white or light in the second exposure will likely be blown out in the final image. The challenge is placing the second exposure when the first exposure is only in your memory.

    This image has an empty alt attribute; its file name is 2019-03-23_0005.jpg
    Exposure #1 is the camera, my Mamiya 6. Exposure #2 is the pile of film. Bottom photo is the final product. If I did it again, I would eliminate the rolls of film which are predominantly white as the shape and detail of the camera is lost in the lower left. Shot on Canon AE-1 Program with Fuji Velvia 100 RVP.

    What settings should I use?

    Depending upon the sensitivity and latitude of your film, you may have to make adjustments to your exposures to make sure that your final image appears as you like. With slide film, the exposure latitude is pretty tight, so consider underexposing so that the final image is not completely blown out. I would suggest doubling your speed or stopping down a full stop for each exposure. I have had success with shooting at box speed with most of the color negative film stocks used, but it takes some experimentation and the need to make adjustments will vary depending upon the circumstances and what you desire in the final image.

    This image has an empty alt attribute; its file name is Anguilla-2019-Film-Road-Trip-Double-Exposures-Film-119.jpg
    Exposure #1: Palm tree in full sun. Exposure #2: Beach and ocean along Maunday’s Bay, Anguilla. Shot on Canon EOS 1v with Kodak Portra 800.

    I should point out that although commonly called “double exposures,” a more accurate name is “multiple exposures.” You are not limited to two exposures on each frame, although you should keep in mind that the more you shoot on a single frame, the more potential for overexposure and losing details.

    This image has an empty alt attribute; its file name is Anguilla-2019-Film-Road-Trip-Double-Exposures-Film-117.jpg
    Exposure #1: Palm tree at Belmond Cap Juluca, Anguilla. Exposure #2: Sailboat on Maunday’s Bay, Anguilla. Shot on Canon EOS 1v with Fuji Provia RDP III.

    Are all film cameras capable of double exposures?

    No, although some which don’t have the feature have some workarounds to allow for double exposures. For example, my Canon EOS 1v is very easy when it comes to doing double exposures. You open the side door, push the multiple exposure button (it looks like two photos stacked upon one another), rotate the camera’s dial to the number exposures desired, and start shooting. It automatically resets to normal shooting mode when the multiple exposure is complete.

    This image has an empty alt attribute; its file name is Anguilla-2019-Film-Road-Trip-Double-Exposures-Film-203.jpg
    Canon EOS 1v

    On my Mamiya 645 Pro TL, there is a switch on the side of the camera which has two positions. Switch the camera from the unlabeled normal position (the white box) to “MULTI.” In this position, the film will not advance, but the shutter will be recocked, allowing for multiple exposures. You have to manually return the switch to the normal position and advance the film to exit the multiple exposure mode.

    This image has an empty alt attribute; its file name is 2019-03-23_0006.jpg
    Mamiya 645 Pro TL: Left photo shows the position of the multiple exposure switch with the grip removed; Right photo shows the position of the switch on the Mamiya WG401 Power Drive Grip.

    With my Canon AE-1 Program, it was not designed to offer double exposures as a feature, but I have been able to create a workaround. After you shoot the first exposure, press and hold in the rewind button on the bottom, and move the advance lever forward, but don’t release it. Then release the rewind button and allow the advance lever to return to its normal position. Then fire the second exposure and advance normally.

    This image has an empty alt attribute; its file name is Anguilla-2019-Film-Road-Trip-Double-Exposures-Film-204.jpg
    Canon AE-1 Program

    I haven’t found a workaround for my Mamiya 6, so if anyone has any ideas, I would be glad to give it a try!

    This image has an empty alt attribute; its file name is Anguilla-2019-Film-Road-Trip-Double-Exposures-Film-105.jpg
    Exposure #1: My daughter’s profile, taken from a low angle to have the sky as a background to fully expose the area behind her face. Exposure #2: Palm berries on the island of Nevis. Shot on Canon EOS 1v with Kodak Portra 400.

    I’ve had failures as often as successes, but I find double exposures to be loads of fun and I will continue to try them in the future. Give it a chance and you’ll be hooked!

    Postscript: One more from the island of Grenada, shot on Fuji Provia 100F RDP-III, and developed with my own sous vide:

    This post originally appeared on our Caribbean travel website, My Irie Time. Give it a look for more posts on our travels through the islands.

  • #FilmRoadTrip – Nevis

    #FilmRoadTrip – Nevis

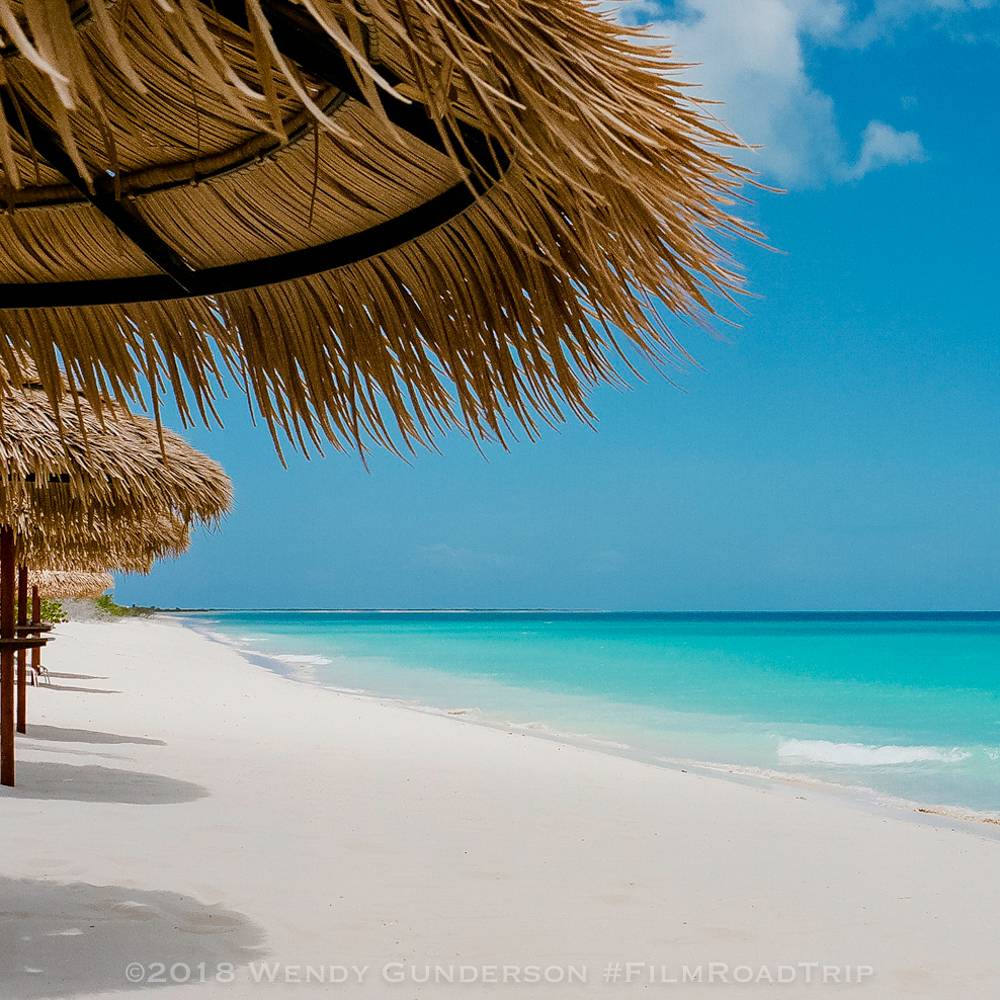
    Since returning to film photography a few years ago, I make a point of taking at least one film camera on each trip.  Part of the reason is that I love the look of film.  I also love playing with my old cameras and trying different techniques.  Traveling to Nevis, I packed two film cameras, the Canon 1v, which uses all the same lenses as my DSLR, and the Mamiya 645 Pro TL with the 80mm f/1.9 and the 45mm f/2.8 lenses.  I decided to try some slide film, so I packed a few rolls of Fuji Velvia 100 RVP, along with my trusted stocks,  Kodak Ektar 100, Fuji 400H, and Kodak Portra 400. Check out the results of our adventures in film photography on Nevis!

    Velvia 100 v. Ektar 100

    As to the slide film, I appreciated that there was a very small window for error in exposure.  The tradeoff was incredibly vivid images. When the exposure was relatively even across the frame, Velvia is perfection.  When there is a harsher difference from top to bottom, Ektar performed better, at least in some respects.  For example, look at this shot of the beach.  Velvia is on the left.  Ektar is on the right.  Both were shot at box speed.  These were shot close in time, although not at exactly the same time for obvious reasons.  In Photoshop, I used the color match tool to have the best comparison between the two images. Both were shot on the Mamiya 645 Pro TL.

    Film Photography Nevis

    It appears to me that the detail in the highlights has been lost on the Velvia on the top of the umbrella where it was overexposed.  I do appreciate that I have a bit more shake on the Velvia image (you can see it’s sharper under the umbrella on the Ektar image), perhaps human error, or perhaps it was a bit of wind which shook the umbrella accounting in part for the difference. Regardless, I love the fine grain on the Velvia, and the depth of color is striking.Film Photography Nevis Film Photography Nevis Film Photography Nevis

    Where the exposure was more even across the frame, the Velvia was beautiful.  I will definitely be shooting more slide film.Film Photography Nevis

    Human Error

    My standby film stocks are my standby’s for a reason.  They perform beautifully, even when I am not so precise on my exposures, and even when I made some grave errors.  For example, I had a few rum drinks at Sunshine’s beach bar, and while changing the film out of my Pro TL, I dropped a roll into my lap.  I thought all those exposures were completely lost as I fumbled to quickly roll it back onto the spool.  Although there is evidence of light leak as a result of my fiddly fingers, the exposures survived.  I cropped it square and applied a gradient and the shot was salvageable.

    FilmRoadTrip Light Leak

    Double Exposures

    I experimented with double exposures this trip, using my Canon 1v and a roll of Portra 400.  On the 1v, you open the side panel and press the multi exposure button to enable multiple exposures. After you shoot the second frame it resets, so you don’t forget and end up shooting a whole roll of double exposures.  This was my first try, and in the future, I will try to put the elements of the second shot just off the face.

    FilmRoadTrip Double Exposures

    Here are a few more film images from the trip.

    Film Photography Nevis
    All shot on Mamiya 645 Pro TL. Clockwise from top left: Portra 400, Portra 400, Ektar 100, Ektar 100, Ektar 100, Fuji 400H, Fuji 400H, Ektar 100

    Overall, I was glad to bring all the extra gear to shoot film on this trip.  It is fun to experiment with film photography, and even the failures are not so bad.

    Get Spare Cards and Readers Steady up your Shots Get a Tripod Protect your Gear Get Bags and Cases Dont forget that Lens Select a Spare Camera Check out all of the Photo Gear youll need.

    Pin it!

    Film Photography with the Canon 1v and Mamiya 645 Pro TL